Edge-Joint
Status : Bench Tested
A joint formed by gluing two or more boards together edge-to-edge along their long grain to create a single, wider panel (such as a tabletop or cabinet door). It also refers to the act of flattening and squaring the narrow edge of a board (90 degrees its face) using a jointer or hand plane.
My Workbench Note: First Impression
An edge-joint looks deceiveingly simple on paper, but reality hits quickly when you try it for the first time without heavy machinery. Working out of a small garage means I don’t have the luxury of a stationary jointer or planer/thicknesser.
My first real test with edge-jointing was on The Sapele Reading Desk. I needed to join two pieces of reclaimed Sapele that appeared straight to the naked eye. The moment I dry-fit them together, light poured through odd gaps at various angles. I went on a mission with a hand plane to square and flatten the mating edges. It was a humbling lesson in precision: even a 0.5 mm variance across an edge compounds into a visible gap once clamped. My final joint wasn’t 100% invisible—there was still a hairline whisper of light passing through—but it was tight, strong, and a massive milestone for my hand-tool skills.
Quick Beginner Takeaways
- Don’t Trust Visual Straightness: Timber that looks flat will almost certainly reveal daylight when mated edge-to-edge. Always perform a light-check before applying glue.
- Hand Planing Demands Micro-Adjustments: A fraction of a millimeter off-square on one board doubles the error when mated with the second board. Match-planing both boards together in the vice can help cancel out minor bevel errors.
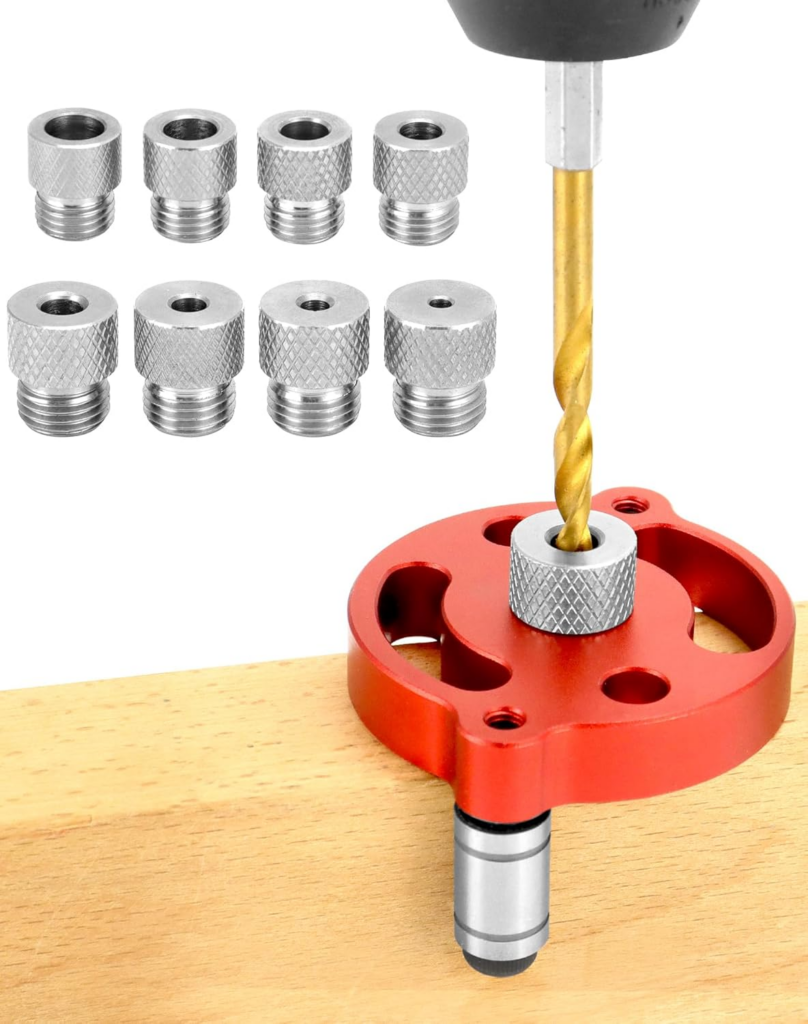
- Dowel Alignment Needs Precision Centering: Without a domino or biscuit joiner, simple dowels work well for alignment—provided you use a dedicated dowel centering tool (image shown in image below) or self-centering jig.
- Drill at a Strict 90 Degrees: When drilling dowel holes into edge grain, any slight tilt in your drill angle will force the boards out of flush alignment during clamp-up. Use a drill guide if you don’t have a drill press.
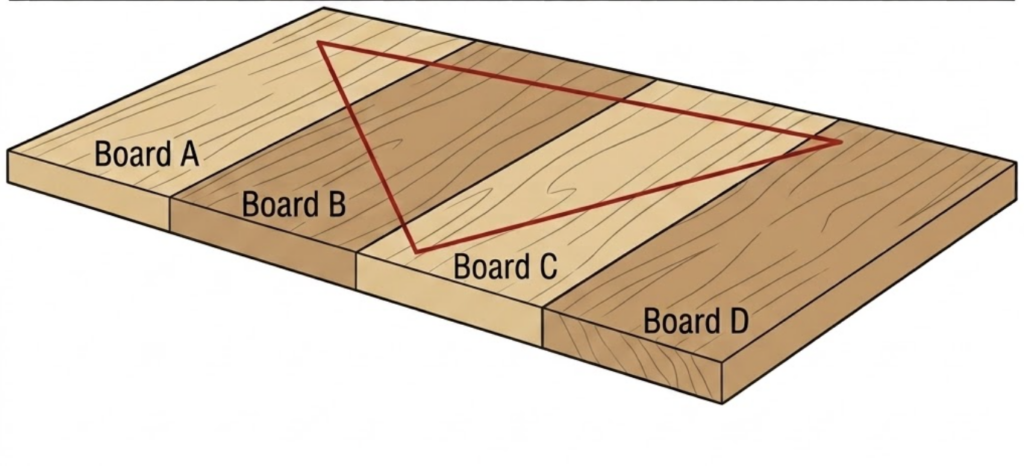
- Cabinetmaker’s Triangle is Essential: Always draw a large triangle across your boards before jointing (as shown in the schematic). It prevents you from accidentally flipping or swapping boards during glue-up.