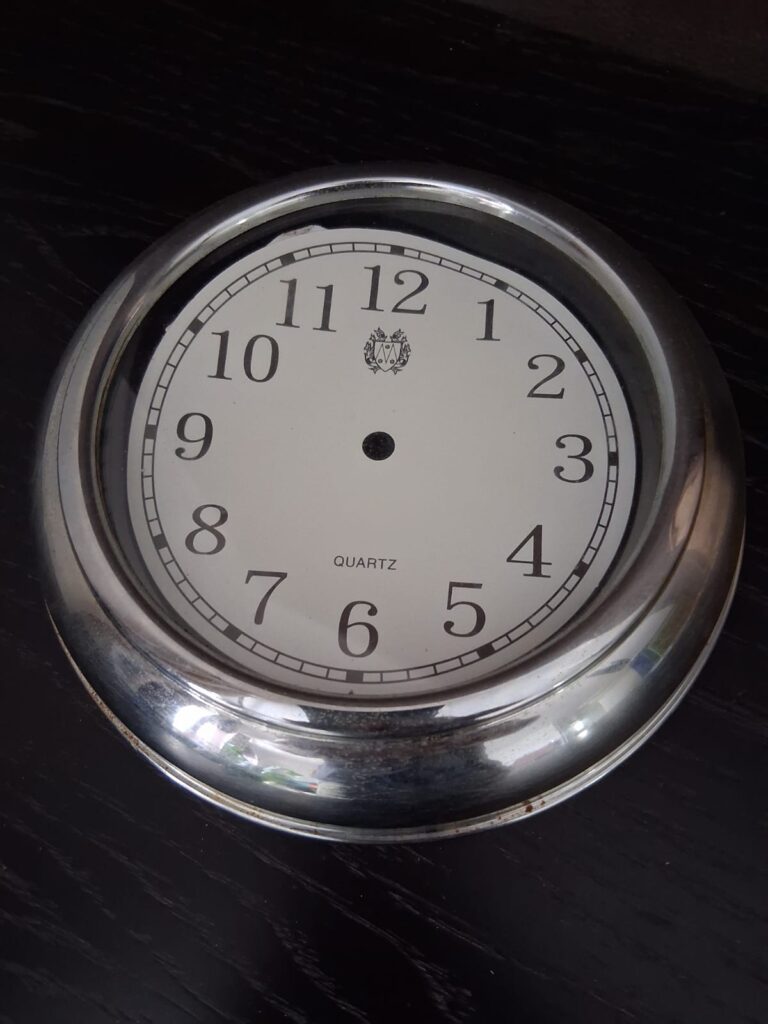
This project was a quick exercise in upcycling and hardware repurposing—taking an old, worn-out clock with a peeling face and giving its inner mechanics a fresh, modern home.
The donor clock: A tired old round frame with a peeling face, but a perfectly functional quartz heart inside – not anymore in this picture.
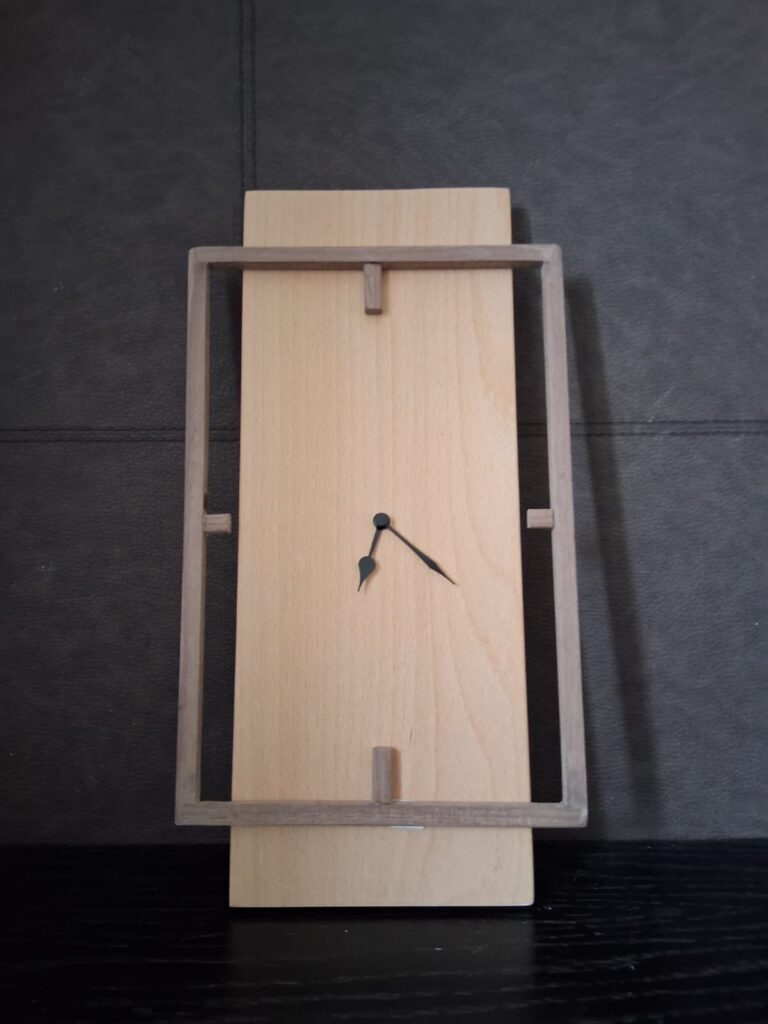
After extracting the still-functioning quartz movement, I set out to build a minimalist, geometric housing for it. The design was inspired by an image I spotted online that paired a wooden face with a floating metal frame. I adapted that idea using materials from the workshop: a light-toned Beech wood body wrapped in a thin, floating frame of Black American Walnut.
The final result: Minimalist beech body with a floating walnut frame.
Although it was a modest build that took just a few days to sort out, it was a fantastic study in millimetric precision. Getting the mounting holes sized and aligned just right so the mechanical movement sat flush was a satisfying challenge.
Ultimately, I’m thrilled with the clean, modern aesthetic of the final piece and giving that rescued hardware an architectural second life on the wall!
Lessons Learnt (The Good, The Bad & The Sticky)
While this was relatively a straightforward build, the bench always finds a way to dish out humble pie. Here are a few key takeaways from the process:
The Squeeze-Out Nightmare: Gluing the delicate walnut frame to the beech body using standard wood glue was… messy. Clamp pressure squeezed wet glue everywhere, and completely removing it without staining the timber proved to be a real battle. Lesson learned: for tiny surface contact areas like this, CA glue (superglue) may be the way to go for a instant, mess-free bond. Experts out there – your insights please !
Light Wood Is a Magnet for Stains: When working with contrasting dual-tone woods, lighter timber like beech is unforgiving. Even a tiny trace of wet glue or sawdust smears instantly onto the pristine lighter surface. I experienced this in my first project – still not learnt I guess !
Tight Spaces vs. Sanding Fingers: Cleaning and sanding inside those micro-gaps between the floating frame and the clock face was an absolute test of patience.
The Bandsaw’s Lasting Impression: If you look closely, a few bandsaw marks managed to survive my sanding barrage. Thanks to helpful feedback from fellow SFWW members, I managed to clear most of them out, but a few stubborn ghosts remain as “texture”!
Proportions Need Tweak V2.0: Stepping back and looking at the finished piece on the wall, the overall proportions could use a bit of refinement—the ratio between the inner beech rectangle and the outer frame feels like it could be dialed in just a little better next time.
Wait, Keyhole Router Bits Exist?! I spent way too long overthinking and manually fussing over how to flush-mount the back for hanging, only to learn afterwards that keyhole router bits are a thing. Where has that tool been all my life?!