Completed between April and May 2026, this swinging mirror was part of a Quarterly Project within SFWW, initiated and led by Adrian Dee. Adrian supplied us with both circular and square mirrors for a start. I picked up a square one – I just thought it may be easier than a round one! The project initiated a deep dive into balancing mechanics, wood species, and structural stability.
Building a functional desktop swinging mirror sounds simple on paper, but getting the weight distribution right so it pivots smoothly without tipping over requires careful engineering. Every timber choice in this piece served a very specific functional and aesthetic purpose.
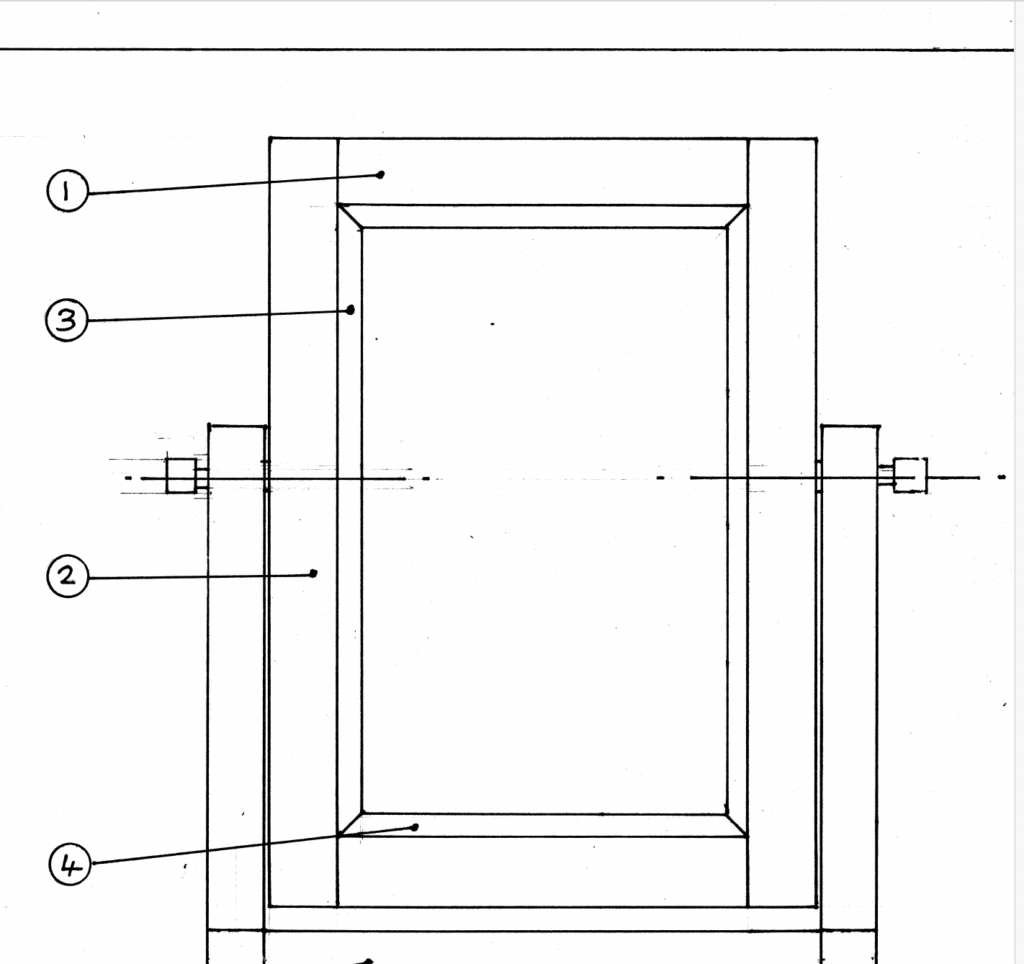
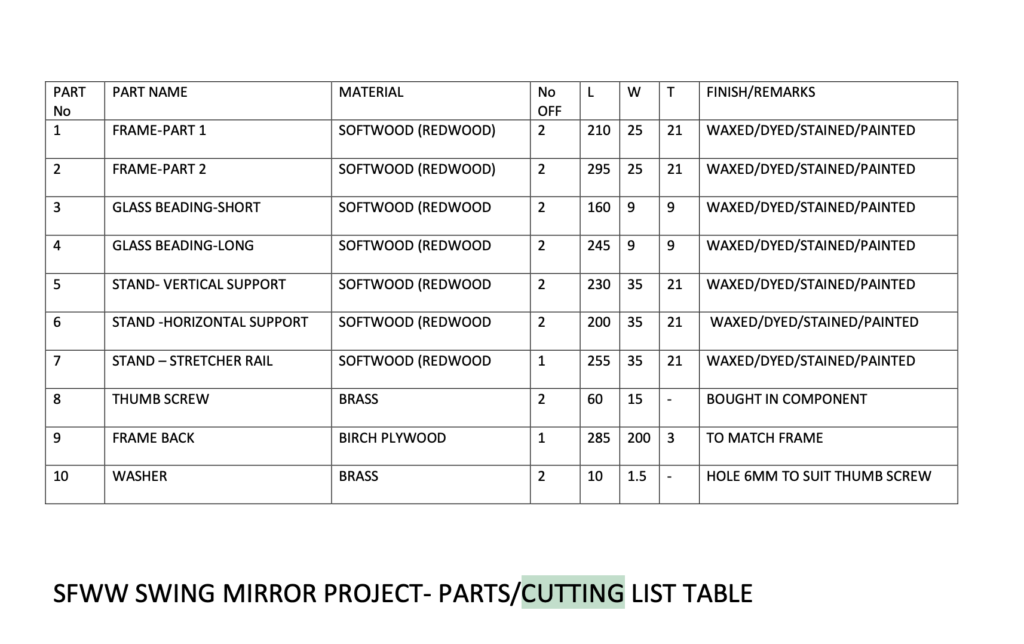
Adrian was kind enough to draw out the sketches for the project and he shared the complete design including cutting list.
As expected, everyone went in their own direction with their mirror designs. I stuck to my guns, though, and delivered on my promise to build a swinging cheval mirror, of-course not the specs given by Adrian!
1. The Frame: Tight-Grained Beech & Dark Wenge Splines
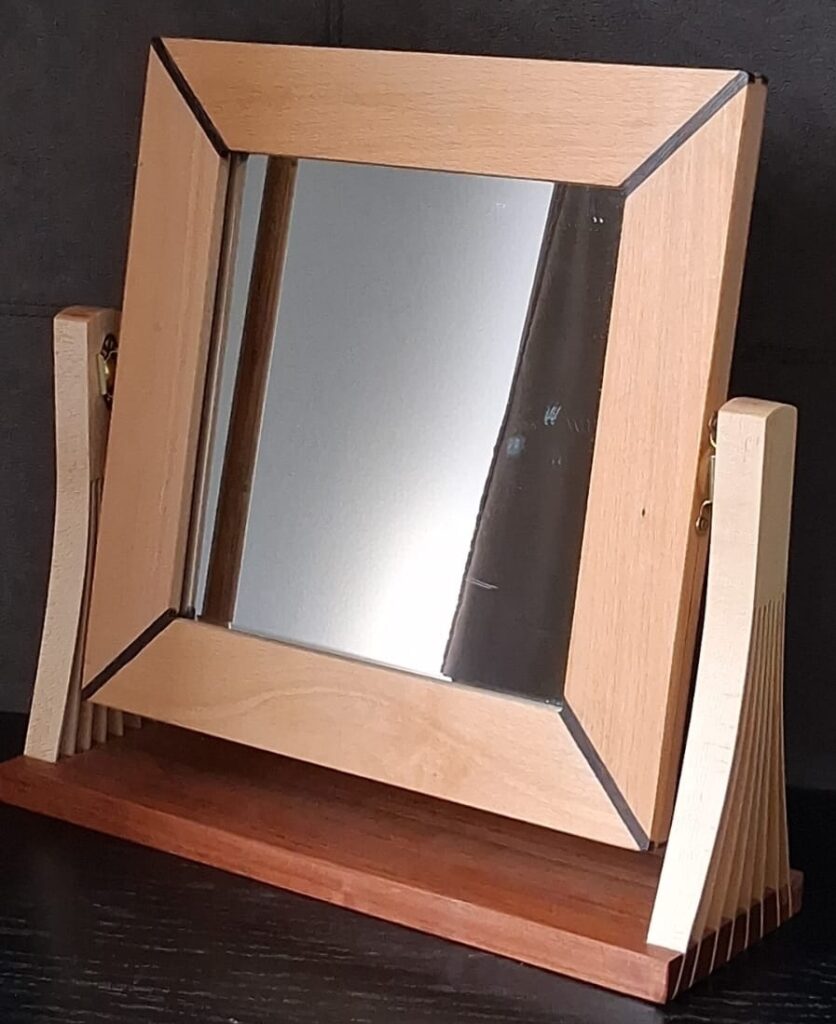
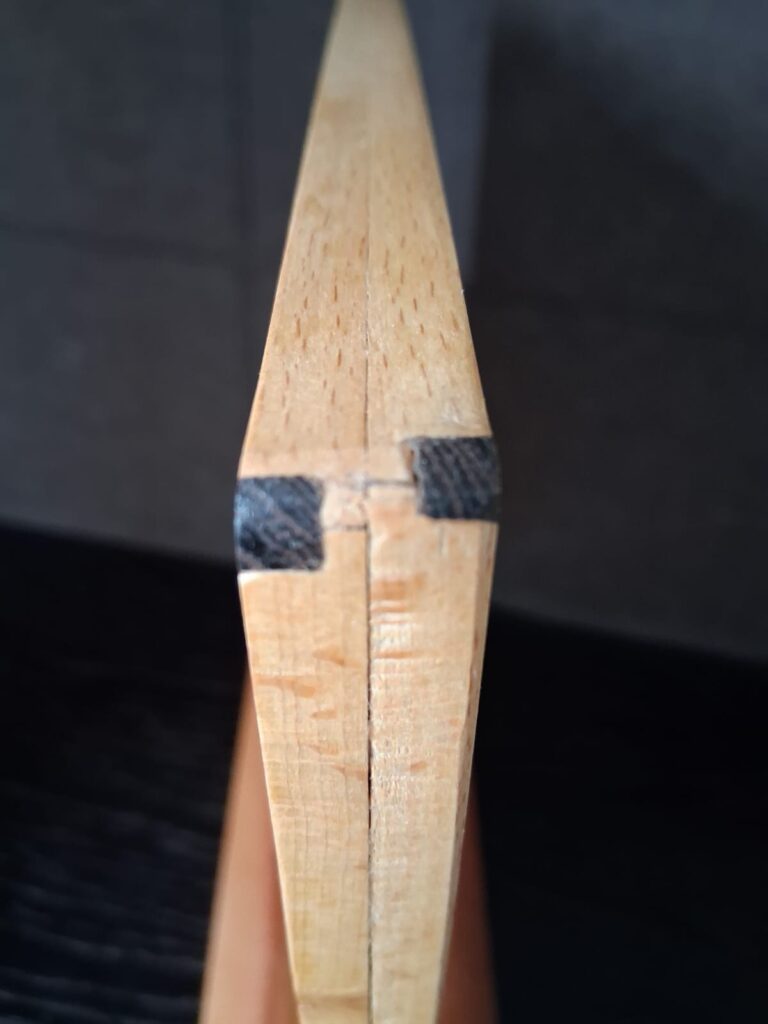
For the primary mirror frame, I selected Beech wood for its tight, predictable grain and stability. To reinforce the mitered corners and add a bold visual pop, I cut dark Wenge wood splines into each corner joint.
Mirror – front face
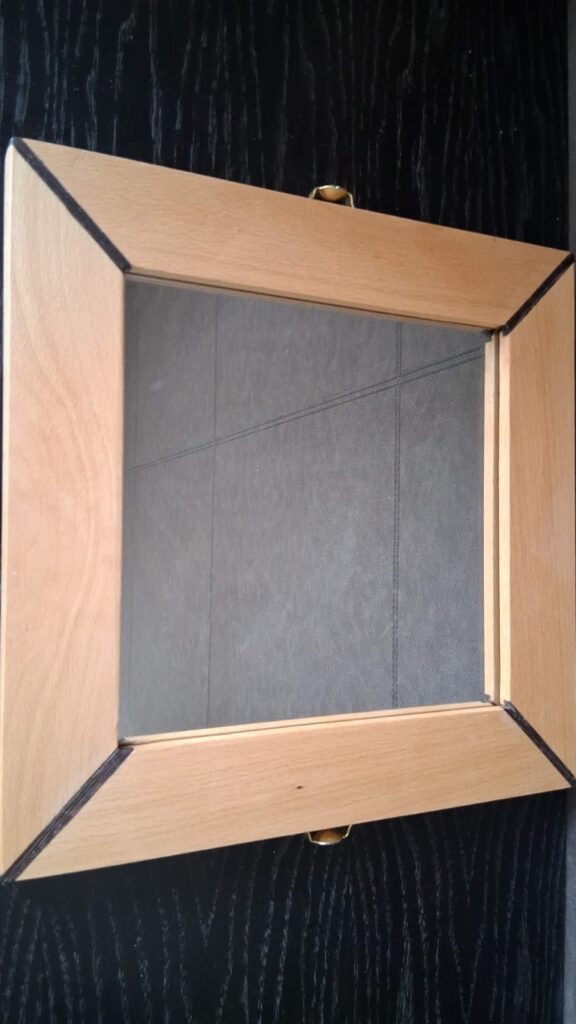
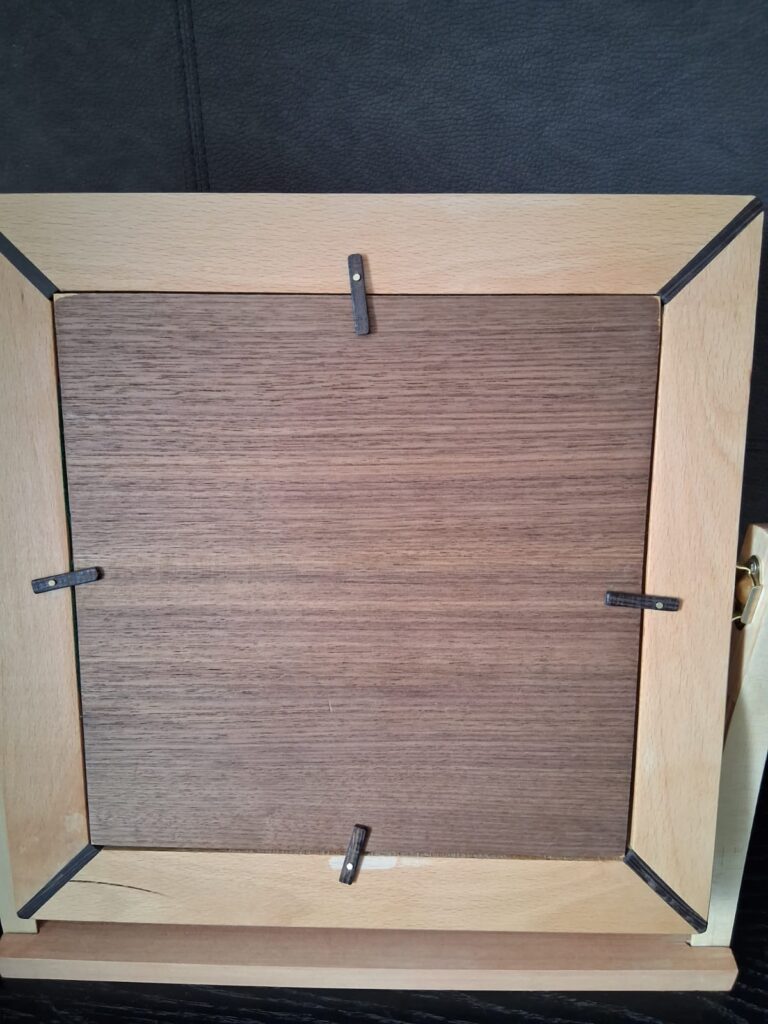
Back face : the mirror and backing board (a thin piece of plywood with black-walnut veneer) are held securely in place using Wenge timber retaining turn-buttons secured with brass pins.
2. The Supports: Pale Poplar & Bent-Lamination “Fans”
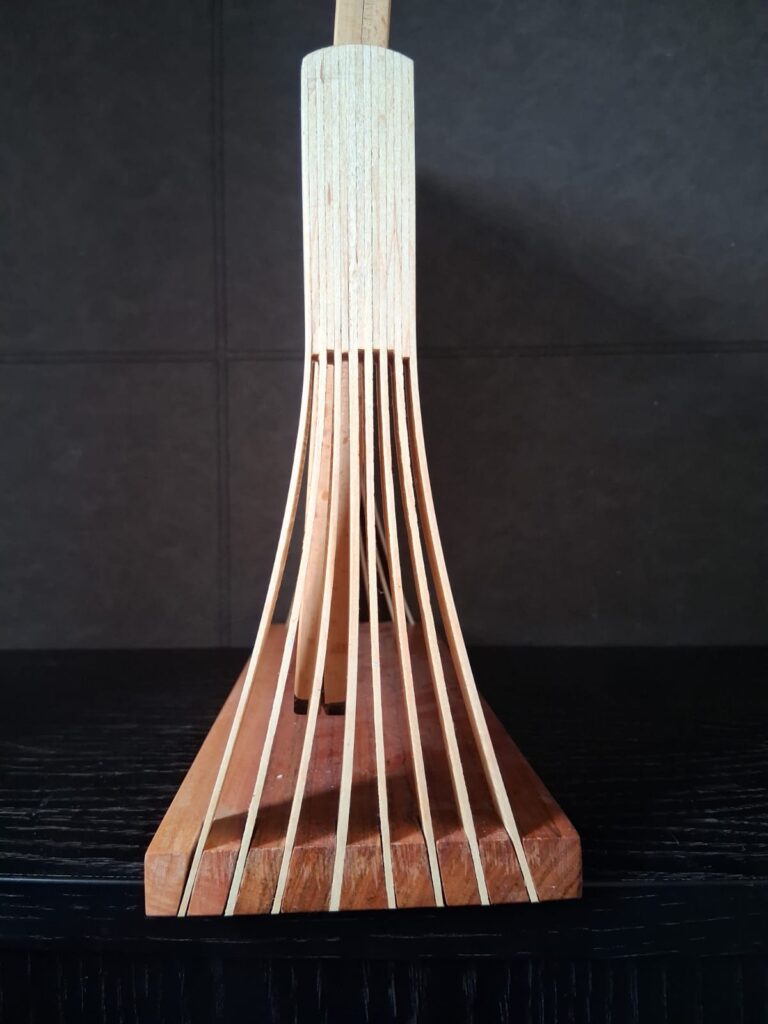
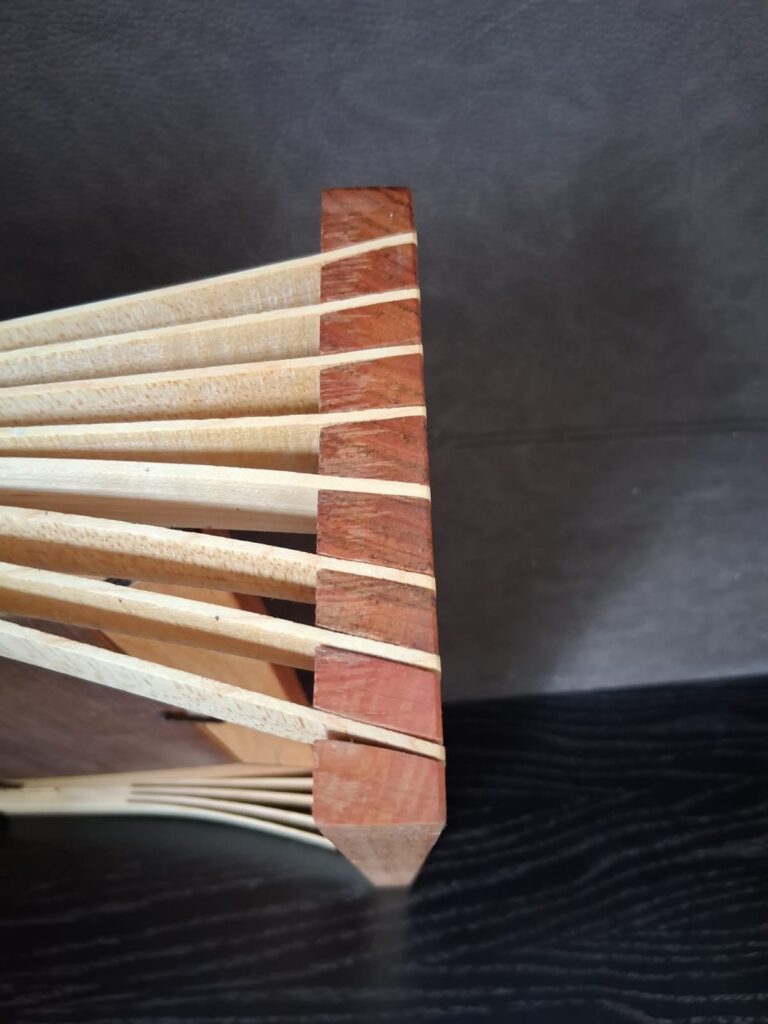
The vertical supports on either side needed to be lightweight yet rigid enough to hold the mirror at any tilt. I used pale Poplar (just because it was quite easy to slide on my small band-saw), crafting a striking flared “fan” design using thin bent laminations.
The sweeping, layered bent-lamination supports sweeping down into the solid base.
These sweeping curved leaves spread out to distribute the load across the width of the base plate, adding a dramatic architectural element to the side profile.
3. Hardware & Center of Gravity
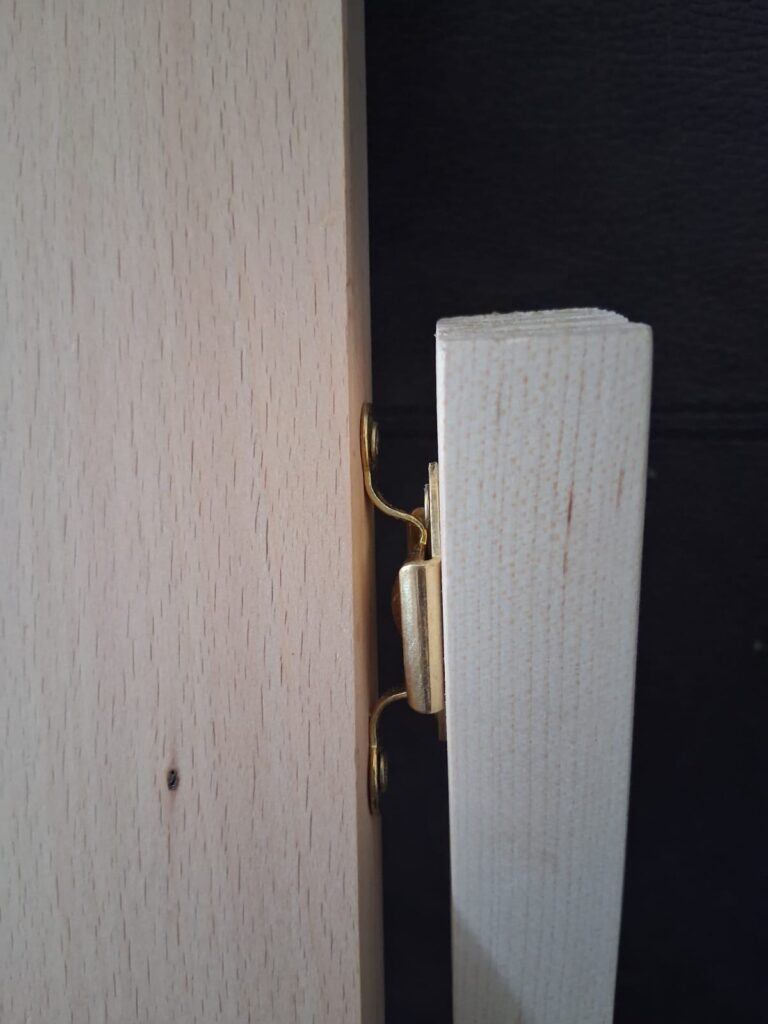
Connecting the frame to the supports required traditional brass cheval pivot hinges (sourced from Etsy), mortised directly into the side uprights and the beech frame to allow a smooth, effortless swing.
Traditional brass cheval hardware mounted flush between the frame and side supports.
To keep the whole assembly anchored safely during use, the bottom plank is made from a heavy, high-density hardwood with a rich pinkish tone (am still trying to figure out what that piece of wood is!). This dense wood lowered the centre of gravity dramatically, ensuring the mirror stays rock-solid on the table while providing a beautiful warm grounding to the lighter timbers above.
Lessons Learnt
1: When Life Gives You Bad Mitres, Call It a “Design Feature”
Since I only had thin stock to begin with, I had to glue two separate pieces together to get the frame thickness I needed. Naturally, this doubled the fun of trying to line up the mitre cuts.
Spoiler alert: the mitre joint went horribly off script.
Instead of throwing the frame across the workshop in frustration, I did what any self-respecting woodworker does—I pivoted. I carved out slots on both the front and back of the joint and glued in slices of dark Wenge. What started as a desperate cover-up operation ended up looking like a completely intentional, stylish accent spline (at least from front and back).
The Wenge decoration was not a design decision – it was just that the mitre-joints were not joining up properly. I ended up routing each mitre joint separately and it ended up with the mid-alignment.
If you look really closely at the edge profile, you can also spot a tiny hairline gap between the two laminated frames. My hand-planing wasn’t quite as flat as I thought, leaving a little “breathing room” for character.
Workshop Rule #1: It’s not a mistake, it’s an original design element.
2: YouTube Makes Everything Look Easy (The Fan Support Saga)
I saw this beautiful, sweeping “fan” design on YouTube and thought, “Hey, that looks simple enough! Just pop a few curved laminations into slots on the base.”
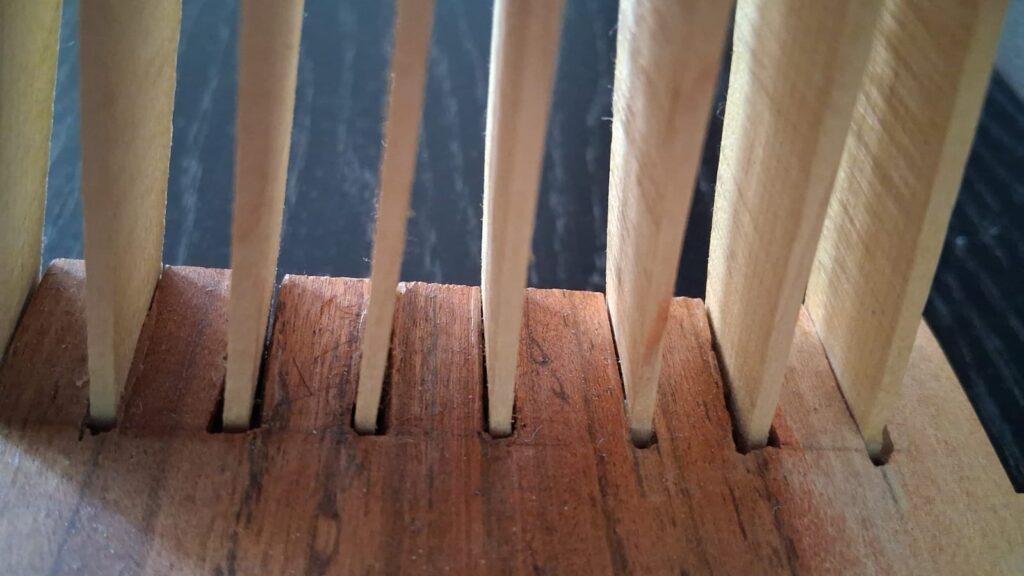
Reality struck hard the second I tried cutting the slots into the heavy hardwood base.
Because the laminations fan outward, every single slot had to be cut at a completely different, precise angle.
Here is how that played out:
Attempt #1 (Miter Saw): Absolute disaster. Trying to set, hold, and safely make micro-angled cuts on a power saw proved nearly impossible (and a bit terrifying).I ended up slicing off a good piece of that heavy base wood to start again.
Attempt #2 (Japanese Pull Saw): Back to hand tools! I ended up sawing every single angled slot by hand.
Then came the real nightmare: cleaning out the slots. Because the kerfs were so incredibly thin, my smallest chisel wouldn’t go anywhere near the back of the cuts to pare away waste. I spent what felt like hours fighting tight spaces, armed with nothing but folded bits of sandpaper and pure stubbornness to get the laminates to sit flush.
Is there a better, smarter way to execute this? Almost certainly (perhaps gluing up pre-angled wooden spacer blocks instead of cutting slots into a solid piece?). The research continues, but for now, those paper-thin slots stand as a testament to sweat and grit!
Another lesson hard-won at the bench: manually ripping hardwood with a Japanese pull-saw is no joke. After the blade got pinched mid-cut, I yanked back to free it—only to drag the razor-sharp teeth straight across my hand. A stack of plasters and a few days of healing later, I finally finished the cut, armed with a new appreciation for saw kerf tension and blade control.
3: The Imperfect Fan (Spacing & Uniformity)
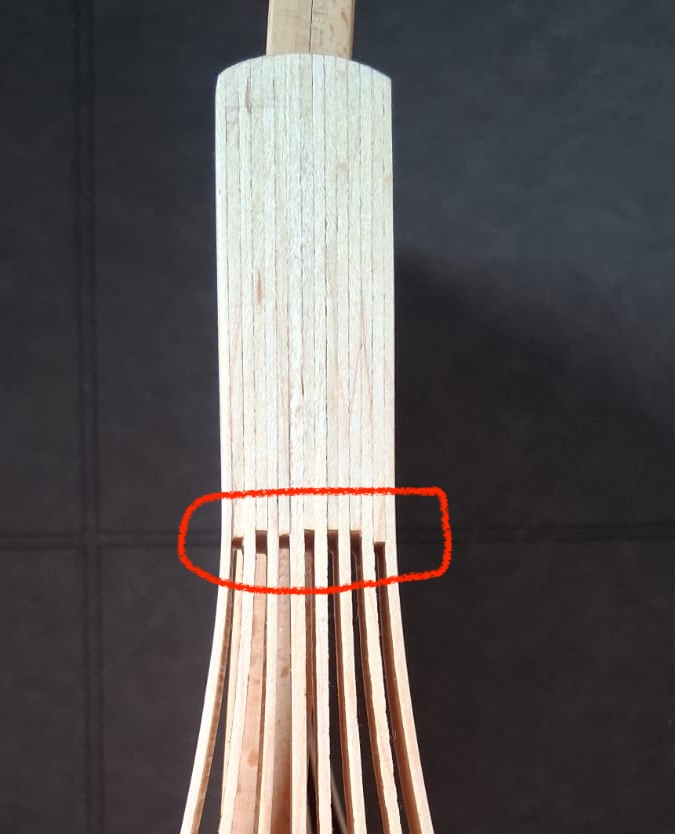
If you look closely at the side profile of those bent-lamination supports, you’ll spot another subtle takeaway: a lack of strict uniformity in the curve.
Also, the laminates ended up looking more like ordinary plywood than the clean, solid block fanning out into thin layers that I’d envisioned. It was a classic case of expectation versus reality. I later learned the secret to making those seams virtually vanish: resawing. By slicing a single block of wood along the grain and keeping every piece in exact sequential order, the natural grain patterns align almost seamlessly when you glue them back together.
Because each strip was glued up and slotted in independently, the spacing and sweep of the “fan” ended up with a mind of its own rather than a mathematically perfect, symmetrical arc.
It’s not a showstopper, but it’s definitely on my mental checklist for Version 2.0. Next time around, I’ll be far more meticulous during the glue-up phase—likely using a dedicated bending form or alignment jig to ensure every single strip bends at the exact same radius and locks into a perfectly harmonious pattern.
Still, there’s a certain organic charm to a fan that bows to its own rhythm!