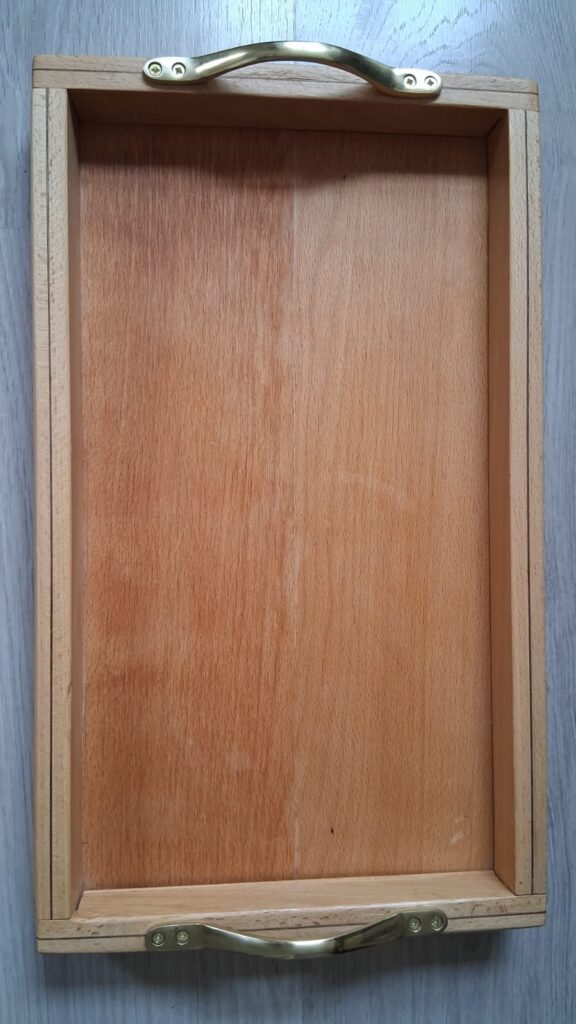
The completed beech wood kitchen tray with brass handles and laminated accent lines.
What began as a seemingly straightforward woodworking project quickly evolved into a three-month exercise in patience, problem-solving, and design pivots. From January through March 2026, this piece spent a lot of time on and off the bench—not because the build was inherently impossible, but because a few early design decisions kept dragging me back to the drawing board.
Despite the delays, the trial and error, and a lot of literal nicks and cuts along the way, the final tray is now a functional, a centerpiece right in the heart of our kitchen.
1. The Design: Beech Wood & Laminated Veneer Accents
The main structure was crafted entirely from solid Beech wood. To give the frame a modern, subtle pop without overwhelming the natural grain, I added a dual-color effect to the outer edges.
This detail was achieved by laminating thin slices of beech together with a striking strip of American black wood veneer sandwiched in between. It creates a crisp, dark accent line running along the entire border, framing the tray beautifully. However, this perhaps was my first design flaw – instead of adding veneer sheets to give accent, I should have gone with a single think slice of dark shaded wood. The finish would have been much better.
2. The Great Design Trap: Hand-Cut Dovetails vs. The Base
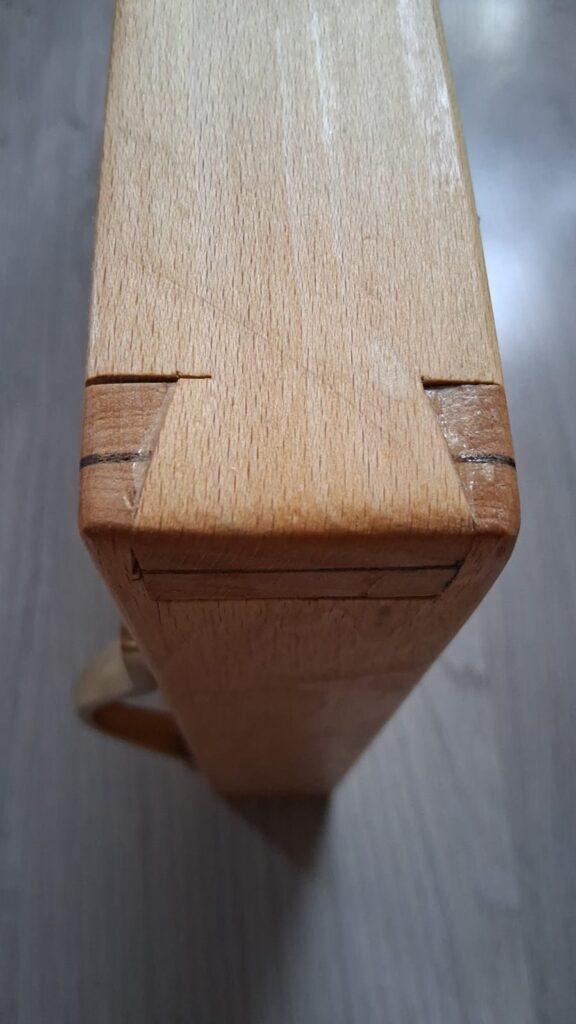
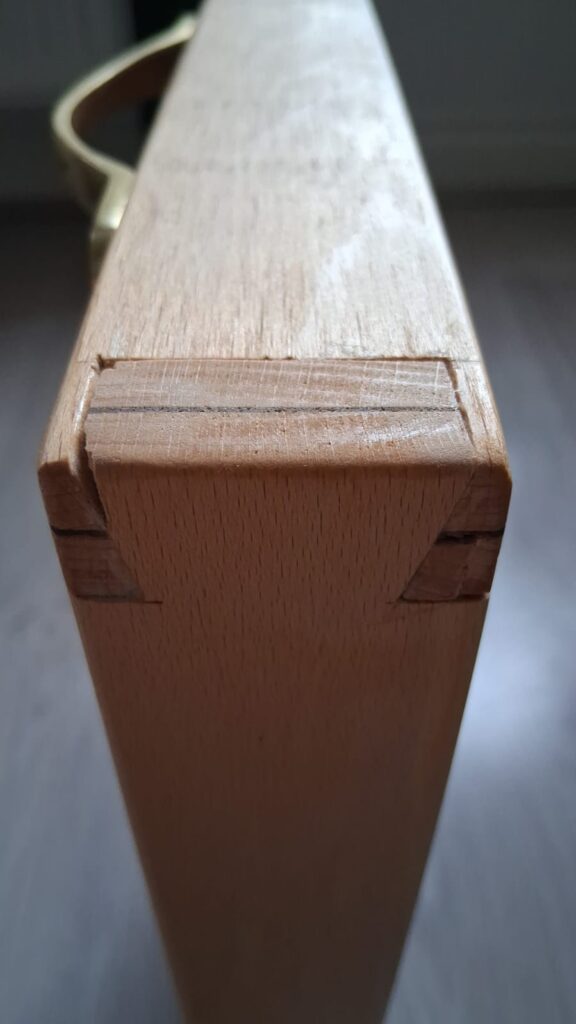
The real test of patience came with the joinery. Wanting to stick to classic woodworking techniques, I decided to go with hand-cut dovetail joints for the corners of the frame.
While dovetails offer unmatched mechanical strength and visual elegance, they presented a massive engineering challenge when it came time to integrate the bottom panel:
The Problem: Glueing up a tight, hand-cut dovetail frame before properly accounting for how the base fits into the internal groove locks you into a corner—literally.
The Struggle: Fitting the base into a pre-joined, rigid frame turned into a tedious, agonizing job of millimeter-level adjustments, micro-shaving, and constant re-fitting.
It was a classic workshop lesson: early, meticulous planning—especially mapping out the sequence of assembly—is paramount in fine woodworking.
3. Lessons Learned over 3 Months On-and-Off
This project wasn’t an intensive weekend blitz; it stretched across three months of stepping away to rethink a step, making an adjustment, and coming back with fresh eyes.
What Went Right
The Hard-Learned Lessons
Laminated Accent Lines: The black veneer sandwich came out crisp and elevated the simple beech wood.
Sequence of Assembly: Always test-fit your grooved base panel before final glued assembly of complex dovetails.
Solid Brass Hardware: The metallic handles contrast beautifully with the warm wood tones.
Design Patience: Rushing past the planning phase to start cutting joinery usually adds weeks down the line.
Bad dovetailing – you can see the cuts and nicksThe other side as well !
Worth Every Minute
Seeing the tray finished and sitting on the kitchen counter makes all the frustration melt away. It serves as a daily reminder that progress in woodworking isn’t just about flawless execution on the first try—it’s about sticking with a piece through every wrong turn until it comes together.