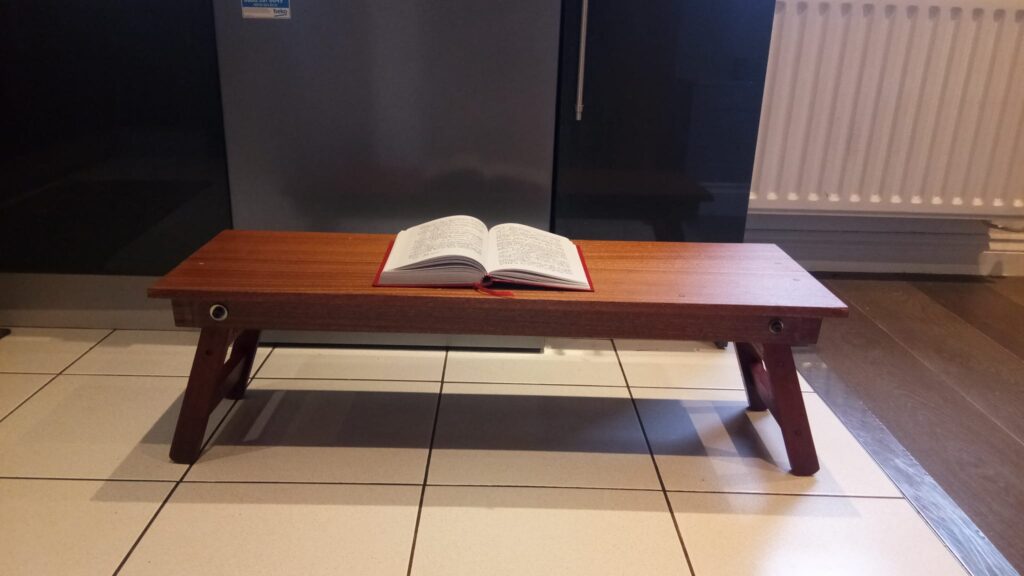
Finding affordable, high-quality hardwood is always a victory, which led me on a drive out to The Useful Wood Company in Woking—a fantastic recycled timber yard. Among the stacks of reclaimed stock, I hit the jackpot and salvaged a long, beautiful length of Sapele. With its rich, warm tones and straight grain, it was the perfect candidate for a custom floor-level reading desk for my daughter.

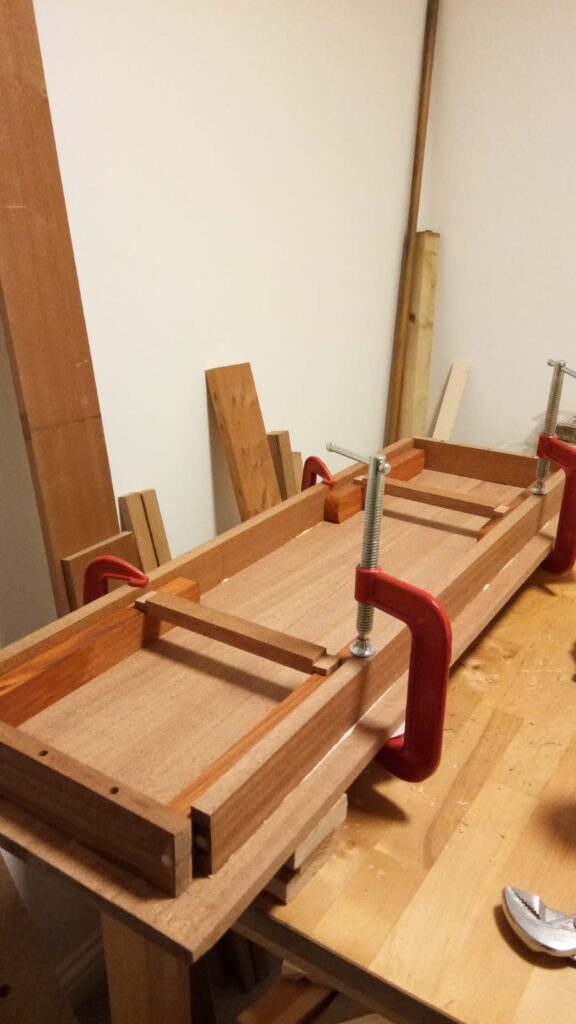
Because the timber was already well-planed, the initial prep was straightforward. I edge-glued two pieces together using simple wooden dowels to form a wide, solid desktop panel. To support the top, I attached structural apron pieces directly underneath using dowels. In hindsight, constructing a standalone apron frame first before mounting the desktop would have been a cleaner, more traditional approach. You can see the gaps that this process created !
Finally, I fitted two angled legs secured with robust hardware, gave the entire piece a smooth finish, and it was complete! Watching a piece of salvaged timber turn into a cherished, functional fixture that my daughter still uses daily for her studies is easily one of the most rewarding parts of this craft.
Lessons Learnt
Every project teaches a few hard lessons, and building this floor-level reading desk from salvaged Sapele was no exception. Looking back, here are the big takeaways I’ll be taking with me into future builds:
1. Buy S4S (Surfaced 4 Sides) Timber as a Beginner
When starting out, flattening, squaring, and milling rough lumber can quickly become overwhelming. Sticking with S4S (Surfaced 4 Sides) boards removes the huge overhead of hand-planing and struggling to get perfectly square edges for panel glue-ups. Once you gain confidence and experience, you can tackle the milling process yourself, but early on, pre-surfaced stock saves endless frustration.
2. Measure Twice, Plan Everything, and Create a Detailed BOM First
“Winging it” on the fly leads to compromises. Because I didn’t lock down a complete design and Bill of Materials (BOM) before making sawdust, I found myself re-imagining structural choices mid-build—like swapping out wood species for the legs or trying to attach structural aprons directly underneath the top instead of constructing a proper, independent apron frame. The result? Noticeable gaps that could have been avoided with a proper blueprint.
3. Invest in a Good Sander & Respect the Grit Progression
There are no shortcuts to a silky-smooth finish. Getting a reliable random orbital sander (with dust collector) and patiently working your way up from low to high grit steps (without skipping any!) is essential—especially on a rich hardwood like Sapele. Don’t compromise or rush the prep work; it’s the difference between a rough DIY job and a piece that feels great to touch every day.